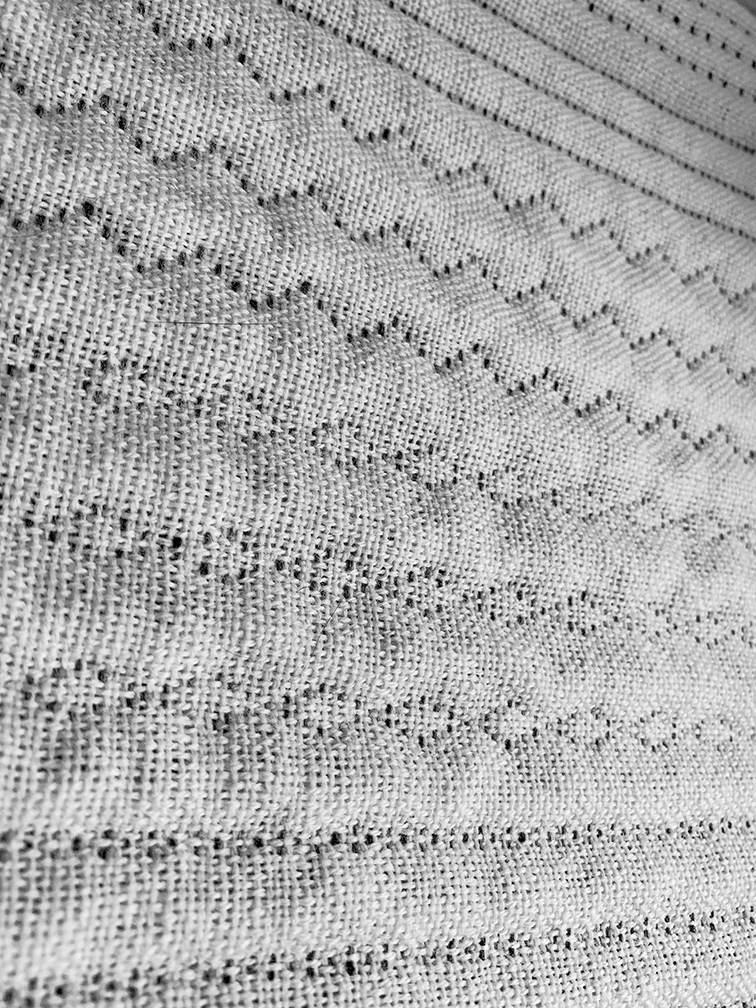
A pique weave is essentially a weft wise cord. It is characterised by raised, wadded areas across the width of the cloth.
A face cloth is woven, usually using a plain weave but doesn’t have to be, which is then padded to create a raised surface. At regular intervals stitcher threads, from a separate warp which has remained hidden behind the cloth, are woven in to the face cloth to create an indentation. In the example above the white ends are the plain woven face cloth and the black threads are the stitcher ends.
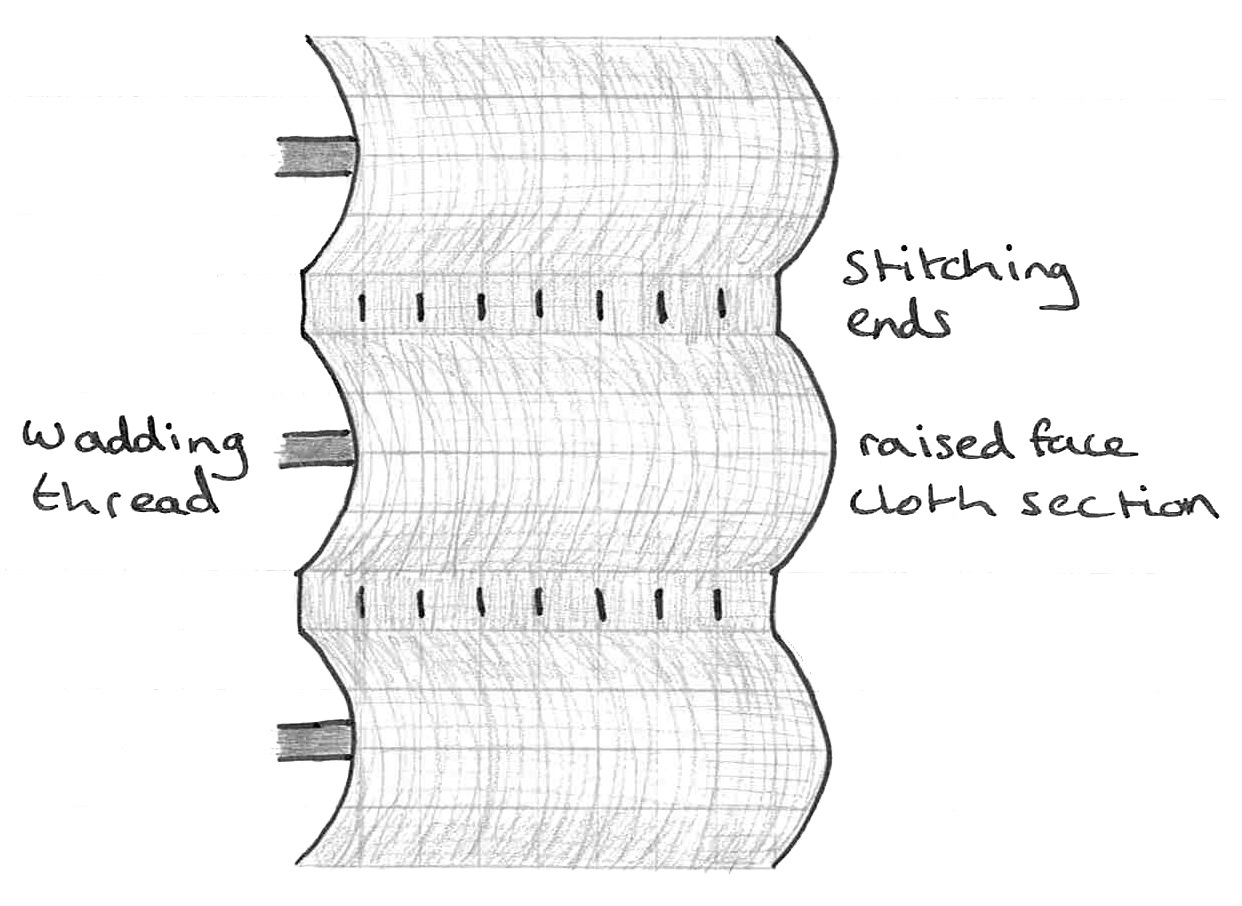
Two warps are used, one for the face of the cloth and on for the stitcher ends. These are usually at a ratio of one stitcher end for every two face ends. These stitcher ends are used to separate the raised wadded areas and are hidden behind the face cloth when not needed. A wadding thread, usually a thick yarn, is inserted in the middle of each section of face cloth to create a raised surface. The stitching ends are brought up at the end of each section and woven in to the face cloth for one or more picks. This secures the face cloth down and creates an indentation across the width of the fabric between weaving each section of face cloth.
The face and stitcher ends need to be on separate beams to allow the face ends to be woven at a lesser tension so that they are able to raise over the wadding creating height.
A non slippery yarn is best to avoid the weft slipping along the warp.
A Pique can be woven as a loose backed cloth or fast backed cloth. This means that the stitching ends are either floating on the back of the cloth (loose backed) or woven into the wadding on the back of the cloth (fast backed). A loose backed cloth is fine when the back is not going to show. For practicality the back may need to be woven to stop it from catching.
There are multiple ways to vary your Pique:
- The raised, wadded areas can be narrow, wide or a combination of both. However if they are too wide definition may be lost and if they are too narrow they may not show up well.
- The stitching threads could simply be brought up for one pick or for several in a more decorative pattern.
- The wadding can also be varied. A small amount of wadding can produce something subtle or something thicker will produce a more dramatic effect.
Below are some example drafts.
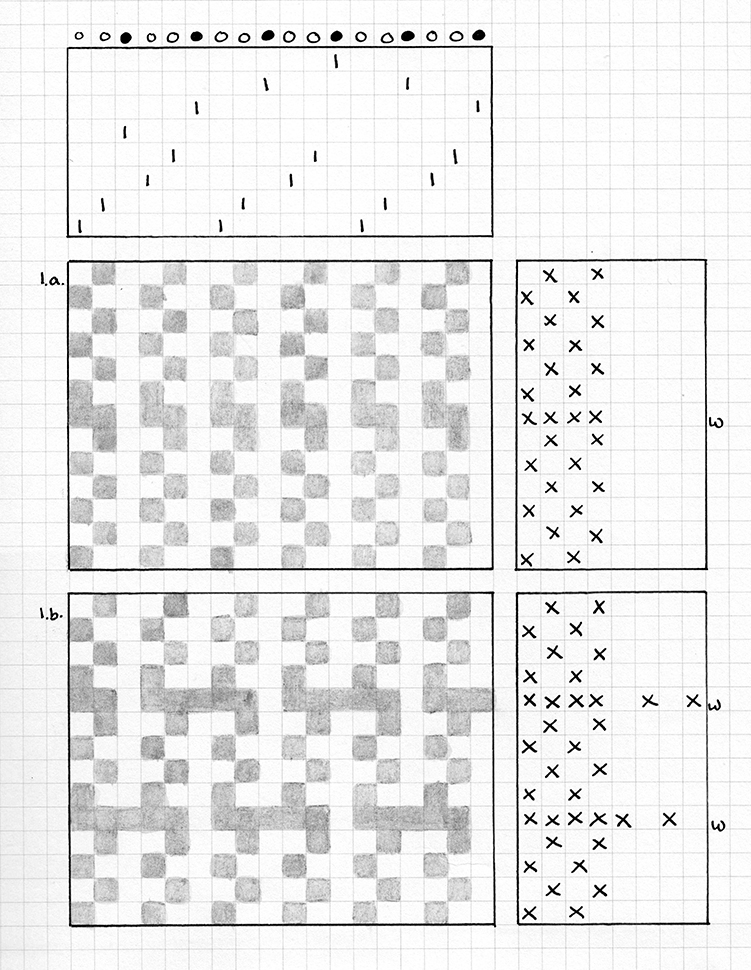
This draft below shows how the raised area could be woven as either a loose backed pique (1.a.) or a fast backed pique (1.b.). The stitcher ends would be woven in before and after each section.
The face ends (white) are on shafts 1 – 4 and the stitcher ends (black) are on shafts 5 – 8. In the loose backed cloth the stitcher ends are left to float behind the face of the cloth which is being woven as plain weave. In the fast backed cloth the sticher ends are woven as plain weave in to the wadding thread(s).
The wadding thread(s) are inserted in each pick where all of the face ends are raised.
The number of plain weave picks can be varied to make the wadded areas wider or narrower. The amount of wadding can also be increased or decreased to vary the prominence on the raised areas.
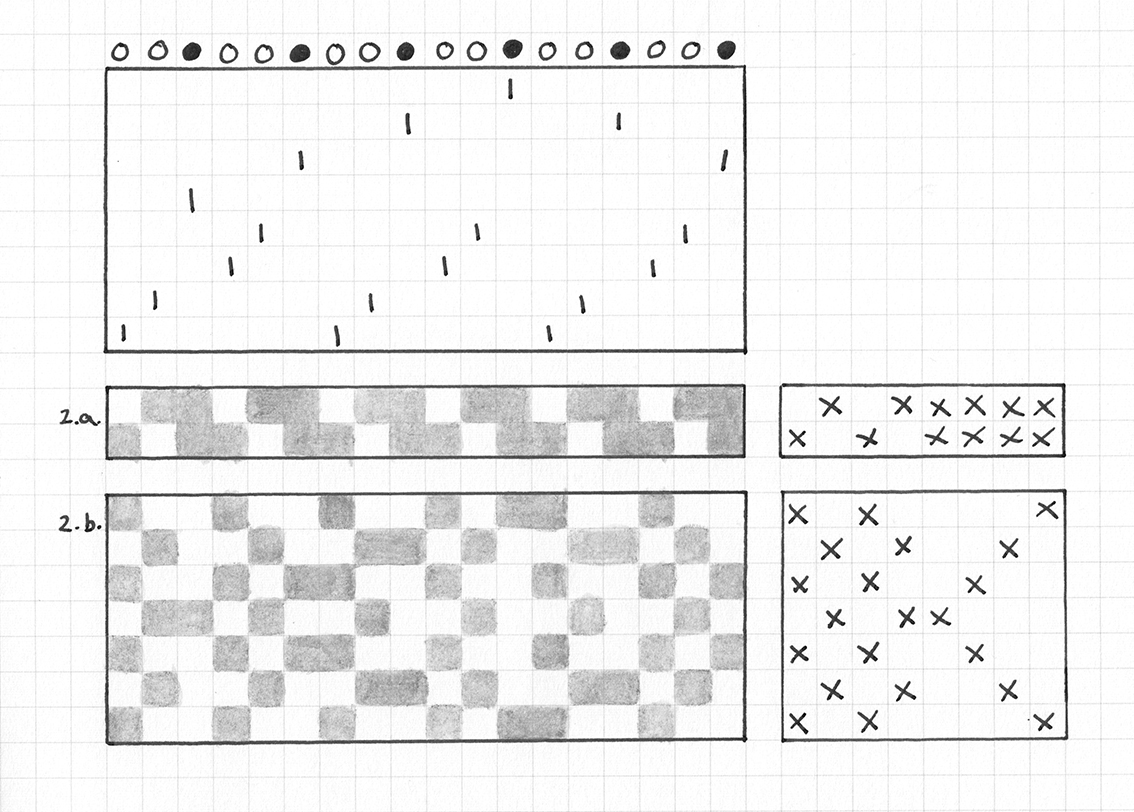
This draft below shows two examples of how the stitcher ends can be woven. They are called stitcher ends because they act like stitches holding the farbic down between each of the raised areas. in the first example the stitcher ends would be raised for two picks between the wadded areas before lowering behind the face cloth again. I find that if the stitcher ends are raised for only one pick then they get lost and don’t show up. In the second example the stitcher ends are raised multiple times between the wadded areas in a diamond pattern. These ends can be raised and lowered as many times as desired to create different effects.
These stitcher drafts would be inserted before and after one of the face weaves above. For example you might choose the loose backed face cloth weave above and alternate it with the first of the stitcher drafts below.