

I have recently been experimenting with indigo. It was a process I had been interested in for a while but didn’t know much about it. It’s been fun trying out different techniques and I have learnt a lot.
I started off with a very technical approach, asking questions such as what happens if I dip fabric once or ten times, does it make a difference if I use a full strength vat or half strength. I quickly realised that indigo’s unpredictable nature doesn’t lend itself to such a scientific approach.
Before I tell you about what I have learnt let’s talk about what indigo is…
Indigo is a natural dye which is used to dye fabric. Traditionally indigo was used to dye denim but a synthetic dye is now used. I use the word dye loosely when talking about indigo because what it actually does is stain the fabric. Unlike synthetic dyes it does not penetrate the fibres in the fabric but rather holds on to the surface of the fabric. If you dye something with indigo and then cut through it, the middle will still be the original colour.
This also means that it is great for resist techniques.
The process for dyeing with indigo is to make up a vat containing various chemicals which create the optimal conditions for the indigo grains. The vat needs to be alkaline for the dye to work. It also needs to be reduced, meaning that the oxygen has to be removed. Salt is also used, as in a lot of dyeing recipes, to ensure the indigo adheres to the fabric. Indigo is not soluble in water meaning that the particles are suspended in the liquid. When the indigo is suspended in the alkaline, reduced solution it is yellowy green in colour until it comes in to contact with oxygen which turns it blue.
To dye fabric… Damp fabric is lowered slowly in to the indigo vat and kept under the surface for 1 – 3 minutes. It is then gently lifted up. It will look green but quickly turn blue as is oxygenates in the air. Once fully oxygenated it can then be dipped again. The number of dips needed depends on the required colour. It is important that as little air is introduced to the dye vat as possible otherwise the vat will become oxygenated and won’t work.
I found that dipping my fabric for about 1.5 minutes and leaving it to oxygenate for about 3 minutes worked well. Some people say that putting your fabric into a citric acid bath after the final oxygenation brightens the colour but I didn’t find it made much difference. This may be more important when using animal fibres as the alkalinity of the vat can damage the fibres, these prefer acidic conditions.
I started off with the idea that I can compare and investigate thoroughly if I start with a control set of samples – cotton poplin fabric dipped as above but with varying dips (1, 3, 5 ,10). Then I could carry on recreating these but varying certain aspects to see the effects e.g. different dip times, washing between dips, using citric acid. However, I quickly realised that indigo is unpredictable. The vat changes as it is used, the indigo concentration decreases with more dips, the vat becomes oxygenated. A 5 dip sample will not be comparable the next five dip sample. It is unpredictable. Which is part of it’s charm.
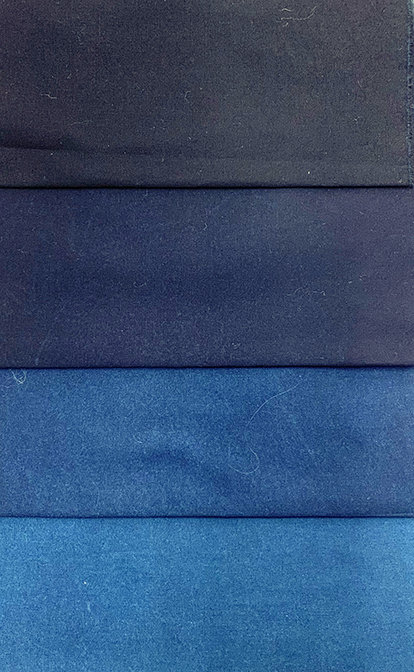
It was more difficult to get a beautiful even colour than I thought it would be. I found that when it was oxygenating any small inconsistency in the fabric would cause a ‘blemish’. Where water sits on the fabric, either at the bottom when hanging or in the slight creases of the fabric, it wouldn’t darken as much as the rest of it. Also, if a thread from the edge of the fabric sat over it, that part wouldn’t darken as much. This is because the oxygen couldn’t get to the indigo on the fabric as easily. I found that I got a more even colour if I washed the fabric in cold water immediately after each dip. Also the more dips the more even the colour.
I was hoping to be able to get a good light colour as well as the classic dark indigo blue but didn’t manage to. If I did fewer dips I got a light colour but it was uneven and a half strength vat didn’t produce a lighter colour with comparable dips.
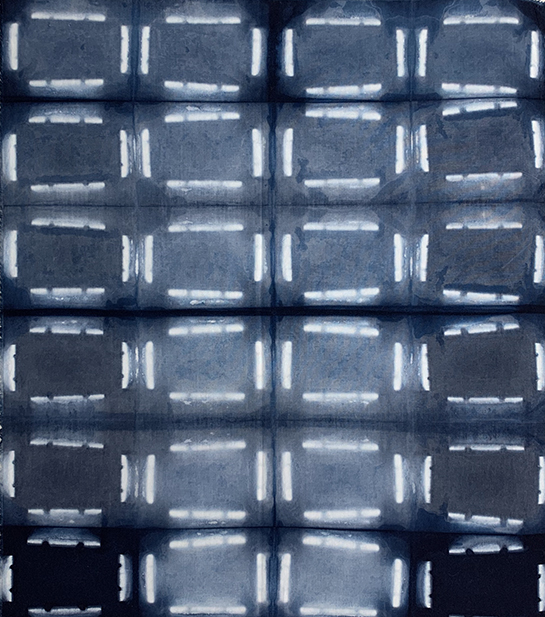
The first resist technique above was created by wrapping fabric around a plastic tube and securing it with elastic bands. I found it very difficult to keep the white bit clean and where the fabric was wrapped over itself I couldn’t get the colour as dark as I would have liked. This is due to the indigo not penetrating the fibres as mentioned above. The second resist was created by folding the fabric and securing with bulldog clips. I found that when using resist I needed to dip more times to darken the colour of the fabric wrapped in the middle. It also needed longer to oxygenate and while it was oxygenating it needed to be opened as much as possible without removing the resist to allow the fabric in the middle to oxygenate.
Overall I found the process really interesting and would love to incorporate it in to some of my woven work.
This is only a brief summary of my experiments in indigo but if you would like more information on my techniques or discuss the process please feel free to comment or email me.